
Webpack—Under the hood
I'm writing react applications for some time now. I use create-react-app whenever I create a new project, and it works great. It abstracts a lot of the things when creating a new project and makes our life easier.
But, as we know sooner or later we have to make some changes in its default configuration, so I looked under the hood of it. I started with one of the most important tool – webpack. I went through the process to build webpack config and I believe this'll help you understand webpack fundamentals and get started with building you own webpack config.
What is Webpack ?
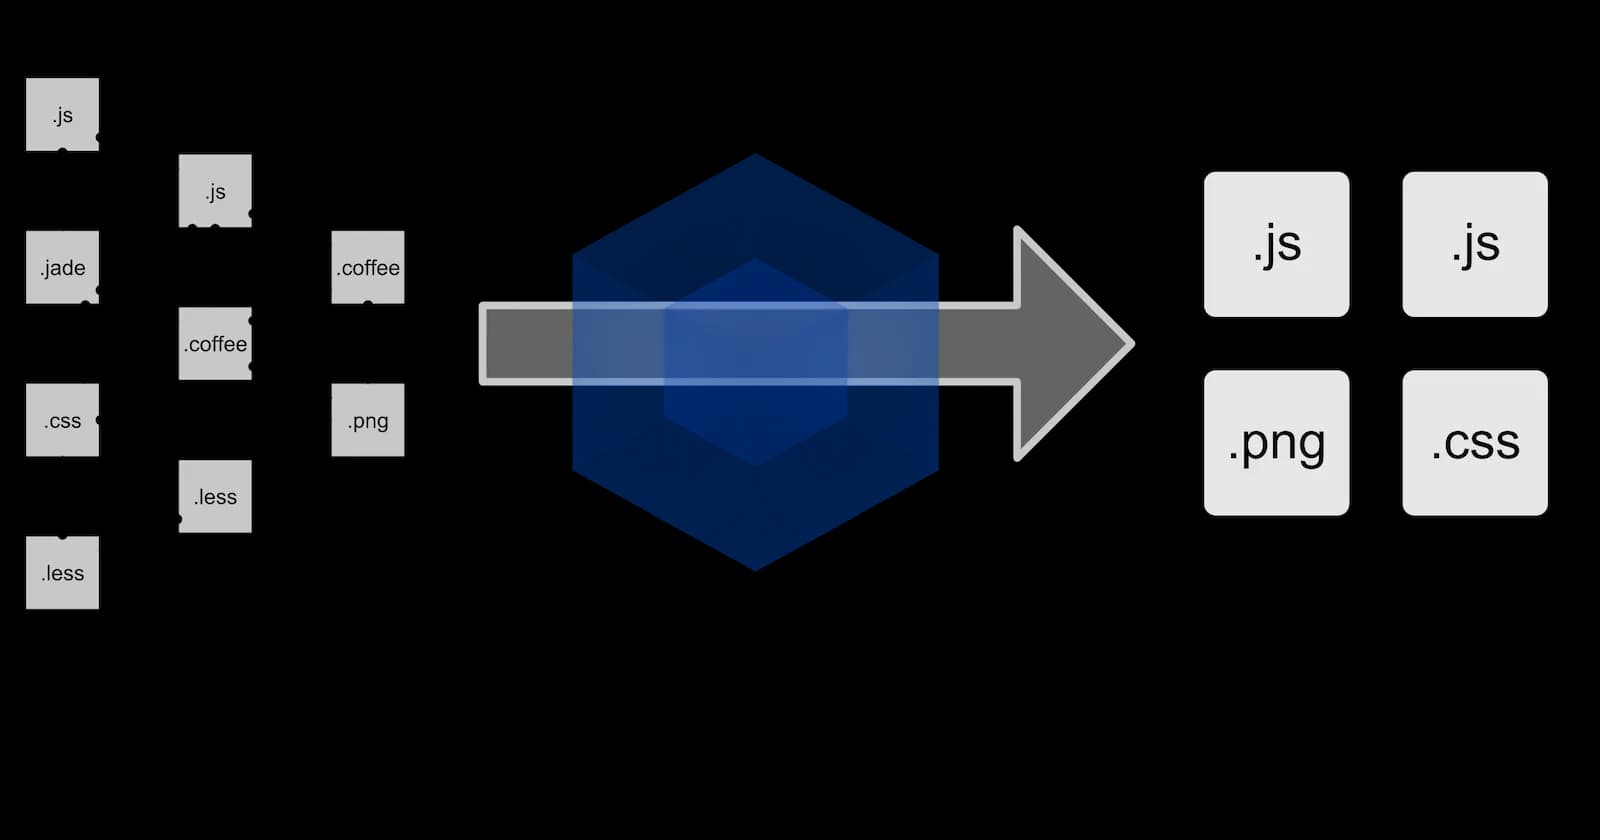
Webpack is a tool that lets you bundle your JavaScript applications (supporting both ESM and CommonJS), and it can be extended to support many assets such as images, fonts, and stylesheets. Webpack divides your code into modules based on how it's used in your app, making it much easier to handle, debug, confirm, and check your code.
You can search more about why we use webpack and problem it resolves. For now, we'll focus on its concepts and how to write its config for our application.
Bundling
When we write our React application, we divide it in es6 modules and import them where they're needed. Old browsers do not support modules.
The old way of dividing the application's code into separate files requires our index.html to include a separate script tag for each file, which increases performance overhead.
That's where webpack comes in handy. We use webpack to bundle the code in a single file which contains the code of the whole application. When we use "npm run build" in app created with create-react-app, it makes use of webpack's bundling feature, which produces the following collection of files in the build directory:
├── asset-manifest.json
├── favicon.ico
├── index.html
├── logo192.png
├── logo512.png
├── manifest.json
├── robots.txt
└── static
    ├── css
    │   ├── main.1becb9f2.css
    │   └── main.1becb9f2.css.map
    └── js
        ├── main.88d3369d.js
        ├── main.88d3369d.js.LICENSE.txt
        └── main.88d3369d.js.map
The index.html file located at the root of the build directory is the "main file" of the application which loads the bundled JavaScript file (static/js/main.88d3369d.js) with a script tag and CSS file (static/css/main.1becb9f2.css) with a link tag.
Bundling is done when we define the entry point for the application. Generally, it is index.js file. When webpack bundles the code, it imports all the code in index.js along with its imports (packages like react/dom, redux, etc) and so on.
Let's create a new directory for the project with the following subdirectories (build and src) and files:
├── build
├── package.json
├── src
│   └── index.js
└── webpack.config.js
The contents of the package.json file can e.g. be the following:
{
  "name": "webpack",
  "version": "0.1",
  "description": "practising webpack",
  "scripts": {},
  "license": "MIT"
}
Install webpack with the command:
npm install --save-dev webpack webpack-cli
Initialize webpack.config.js with the following content:
const path = require('path')

const config = {
  entry: './src/index.js',
  output: {
    path: path.resolve(__dirname, 'build'),
    filename: 'main.js'
  }
}
module.exports = config
Add a new npm script called build that will execute the bundling with webpack:
// ...
"scripts": {
  "build": "webpack --mode=development"
},
// ...
Add some code to the src/app.js file:
const App = () => {
  return null
}
export default App
Add some code to the src/index.js and import app into it:
import App from './App';

const hello = name => {
  console.log(`hello ${name}`)
}

App()
When we run "npm run build" you'll notice it recognizes all the files and bundles them. You can see application code at the end of the file in weird format.
Our webpack config is quite easy to understand. It's a JS file with node's module syntax. We have a config object. Entry property defines the entry point of our application. Output defines the path for bundled file. Path contains "path.resolve" method to define path. "__dirname" is the global variable available in node, which contains the current directory path.
When we turn our application into a minimal react application (I assume you already know how to do that), webpack will fail to bundle our application. Let's see what's happening -
Loaders
By default, webpack only knows how to bundle JS files. In react, we use jsx syntax.
Let's install the loader and its required packages as a development dependency:
npm install @babel/core babel-loader @babel/preset-env @babel/preset-react --save-dev
Let's configure a loader to our application that transforms the JSX code into regular JavaScript:
const config = {
  entry: './src/index.js',
  output: {
    path: path.resolve(__dirname, 'build'),
    filename: 'main.js',
  },
  module: {
    rules: [
      {
        test: /\.js$/,
        loader: 'babel-loader',
        options: {
          presets: ['@babel/preset-react', '@babel/preset-env'],
        },
      },
    ],
  },
}
The definition for a single loader consists of three parts:
{
  test: /\.js$/,
  loader: 'babel-loader',
  options: {
    presets: ['@babel/preset-react', '@babel/preset-env']
  }
}
The test property specifies that the loader is for files that have names ending with .js. The loader property specifies that the processing for those files will be done with babel-loader. The options property is used for specifying parameters for the loader, which configure its functionality.
Our webpack is ready to bundle our React application.
We're using babel for transpiling. It is a process of converting a JavaScript code into other form. We're using ready-made presets as a plugin. As we know, old browser do not support es7/es6 syntax, so we're using '@babel/preset-env' to transpile our code to es5 standard.
We'll do a similar thing for CSS if we import it into our application. We'll define a loader for .css files:
{
  test: /\.css$/,
  use: ['style-loader', 'css-loader'],
}
The job of the CSS loader is to load the CSS files, and the job of the style loader is to generate and inject a style element that contains all the styles of the application.
With this configuration, the CSS definitions are included in the main.js file of the application. For this reason, there is no need to separately import the CSS styles in the main index.html file of the application.
The application's CSS can also be generated into its own separate file by using the mini-css-extract-plugin.
Webpack-dev-server & Source maps
Every time we make a change in our application, we have to bundle our code and refresh the browser. Webpack has a solution for this inconvenience.
Let's add webpack-dev-server:
npm install --save-dev webpack-dev-server
Adding necessary npm script:
{
  // ...
  "scripts": {
    // ...
    "start": "webpack serve --mode=development"
  },
  // ...
}
Add a new devServer property to the configuration object in the webpack.config.js file:
const config = {
  entry: //.... ,
  output: {
    // ....
  },
 devServer: {
    static: path.resolve(__dirname, 'build'),
    compress: true,
    port: 3000,
  },
  devtool: 'source-map',
  // ...
};
It is quite easy to understand. When we use the dev-server, the code is not bundled the usual way into the main.js file. The result of the bundling exists only in memory.
Now you must have noticed one tool I added below the devserver. If we make any error in our application it lights up our console like Christmas tree, but when you track down the source of the error it'll take you to the wrong path in the source code.
We will ask webpack to generate a source map for the bundle, which makes it possible to map errors that occur during the execution of the bundle to the corresponding part in the original source code. It also makes it possible to use debugger.
Minification
If we inspect the contents of the bundle file, we notice that it could be greatly optimized in terms of file size by removing all of the comments. There's no point in manually optimizing these files, as there are many existing tools for the job.
The optimization process for JavaScript files is called minification. One of the leading tools intended for this purpose is UglifyJS. In latest webpack version, we don't need to do any additional configuration. we have to modify the npm script in the package.json file to specify that webpack will execute the bundling of the code in production mode:
{
   //...
  "scripts": {
    "build": "webpack --mode=production",
    //...
  },
  //...
}
You'll notice that the size of our main file will reduce, and it'll directly improve the performance.
Plugins
We can also use webpack's DefinePlugin for defining global default constants that can be used in the bundled code.
Let's take an example, when we want to configure different URL for development and production.
// ...
const webpack = require('webpack')

const url = argv.mode === 'production'
    ? 'https://...' : 'http://...'

const config = (env, argv) => {
   // ...

  return {
    entry: // ... ,
    output: {
      // ...
    },
    devServer: {
      // ...
    },
    devtool: // ... ,
    module: {
      // ...
    },
    plugins: [
      new webpack.DefinePlugin({
        URL: JSON.stringify(url)
      })
    ]
  }
}

module.exports = config
Now we can use "URL" anywhere in our code and webpack will manage everything.
So This is it for now. There are many things we can configure into webpack. Do eject and study about default configuration of create-react-app which will be very informative. Maybe we'll talk more about it in the future. If you want to explore further, there are some alternatives which are gaining popularity like Vite, Rome which is a complete tool chain.